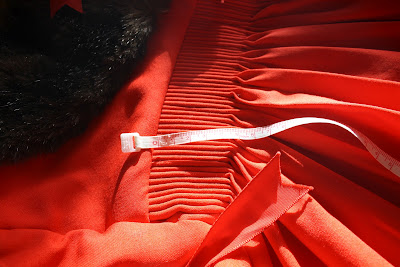
On the Mayor's robes 128cm worth of cloth is pleated into 32cm and then sewn to the yoke. I have been really excited to learn how to cartridge pleat because when you look at historic garments they so often have cartridge pleats on the waistline and so it is a valuable skill to learn.
Graham taught us that cartridge pleats are made by doing rows of running stitches that are an equal distance apart. When these are gathered you tie off the ends so they are tightly pleated. To make the pleats thicker we could experiment with wadding to bulk up the pleats.
To attach to the yoke you catch the edge of each pleat to he design line of the yoke. Each pleat will need 2 stitches to make it secure.
We calculated that 128cm of back fabric needs to be pleated onto 32cm of yoke. 128/32= 4. Therefore for every 1cm on the yoke we need to fit 4cm pleated in the back.
 |
| 2cm stitches, no wadding |
We decided to experiment with different distances of stitches, with and without wadding.
Above is my first sample. Originally we had been told that to make a pleat so wide you need to do a running stitch double that width. So for instance a 1cm pleat would have 2cm wide stitches.
This wasnt the case however and to make a 1cm pleat the stitches need to be 1cm apart.
All my samples are using 40cm of fabric to be pleated into 10cm and therefore this sample was far too loose and thin.
 |
| 1.5cm pleats with one layer of wadding. |
 |
| 0.75cm pleats with one layer of wadding. |
Please see my workbook for samples


No comments:
Post a Comment